Step-by-Step Tutorial
From a fresh machine to a finished agent run: install Tack, create a project, add
tasks, say what "done" means for one of them, set up the agent that will work on it,
hand the task to Claude Code, watch it run, and download the result. Every screenshot below is a real capture from one live session
against a clean database — including the run itself, which is a real model call, not
a mock. (The capture recipe lives in frontend/e2e/tutorial-assets.spec.ts; see
Regenerating these screenshots.)
This page walks one path: the release binary, the web UI, and the embedded runner. The Quick Start covers the alternatives — desktop app, CLI-only agent runs, building from source.
1. Install and start Tack
Tack is a single self-contained binary — web UI, REST API, and SQLite engine in one file. One line installs it:
curl -fsSL https://raw.githubusercontent.com/yielab/tack/main/install.sh | sh
tack            # starts the server + web UI at http://localhost:3210
Verify it's up:
curl http://localhost:3210/api/health
# {"migrations_applied":81,"status":"ok","version":"0.1.0-beta.10"}
migrations_applied is how many migrations this build actually ran — trust that
field over the number above, which is what the build this tutorial was captured on
reported. If this fails, see Troubleshooting.
Homebrew, Windows, and the other install methods are in the [Quic## 2. First open
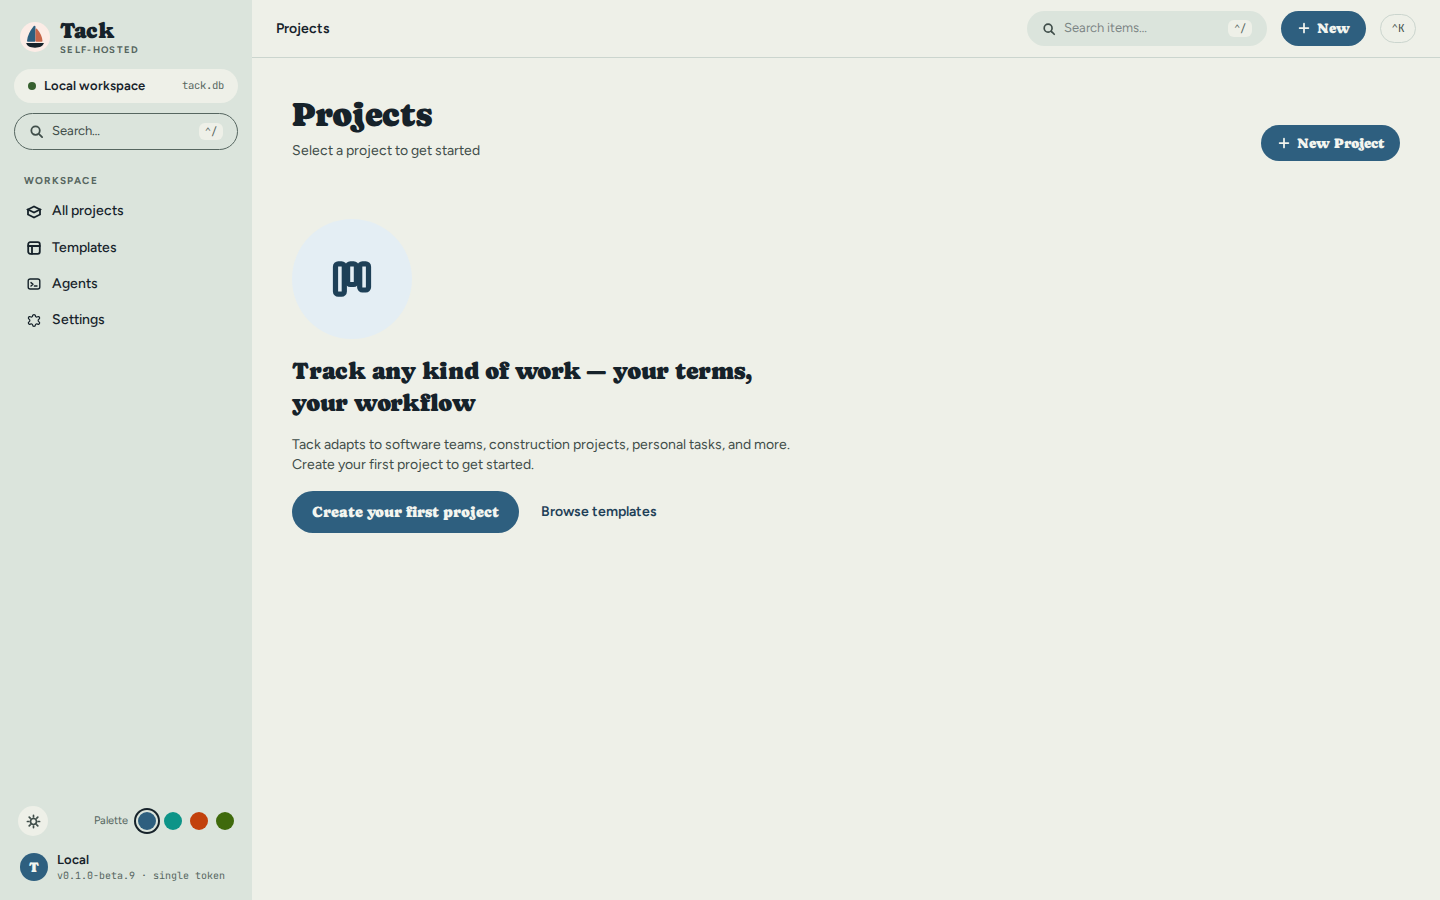
Open http://localhost:3210 in a browser. On a fresh database there is nothing
yet — just the invitation to create a project:
3. Create a project
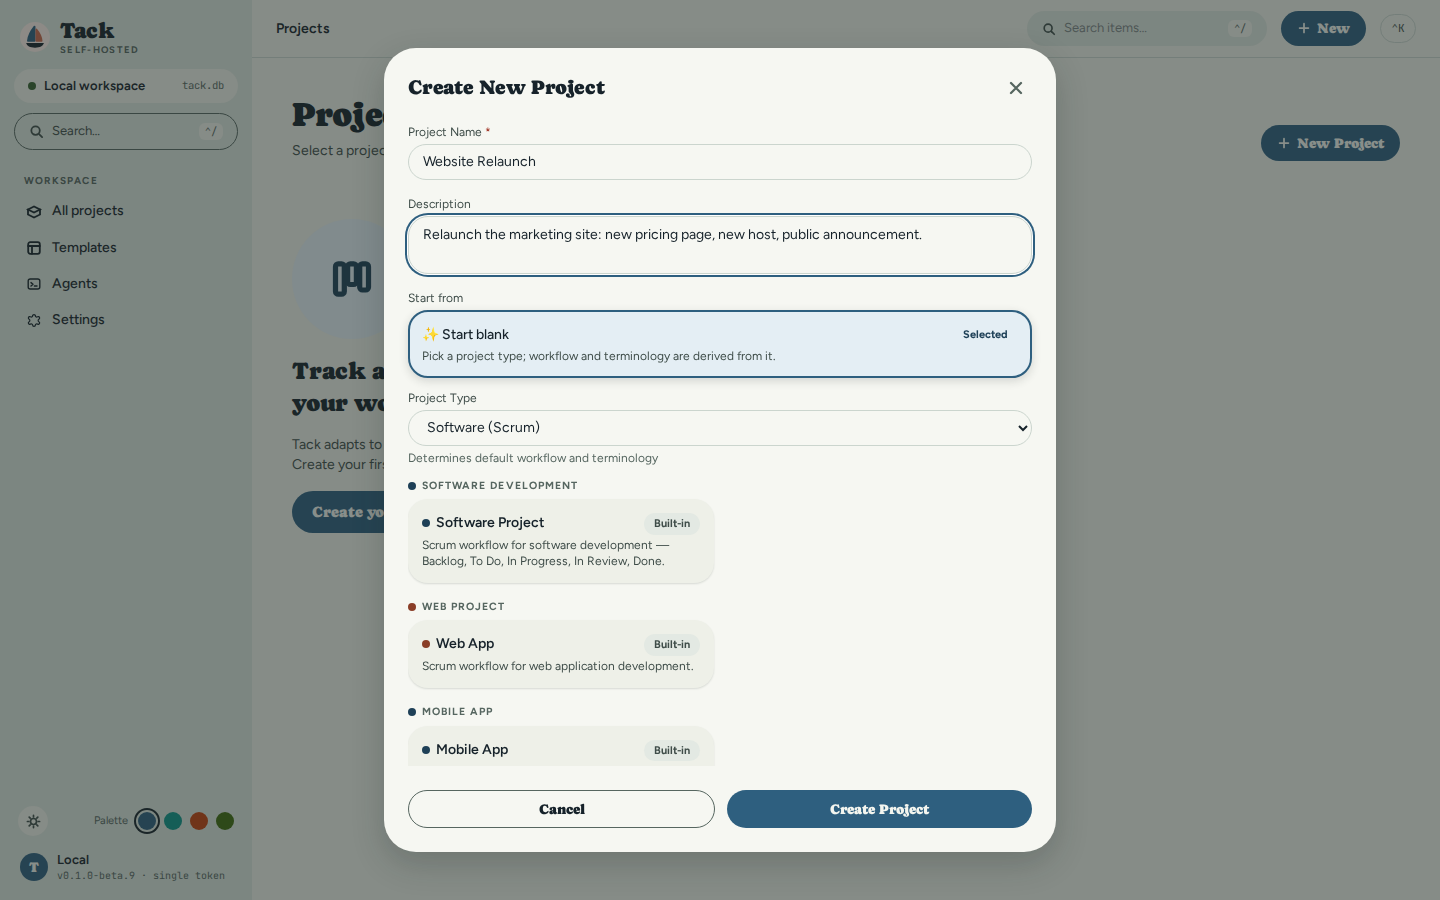
Click New Project (or Create your first project). Give it a name, optionally a description, and pick a project type — the type is a template that pre-loads a matching workflow and vocabulary you can change later. This tutorial creates Website Relaunch as a Software (Scrum) project:
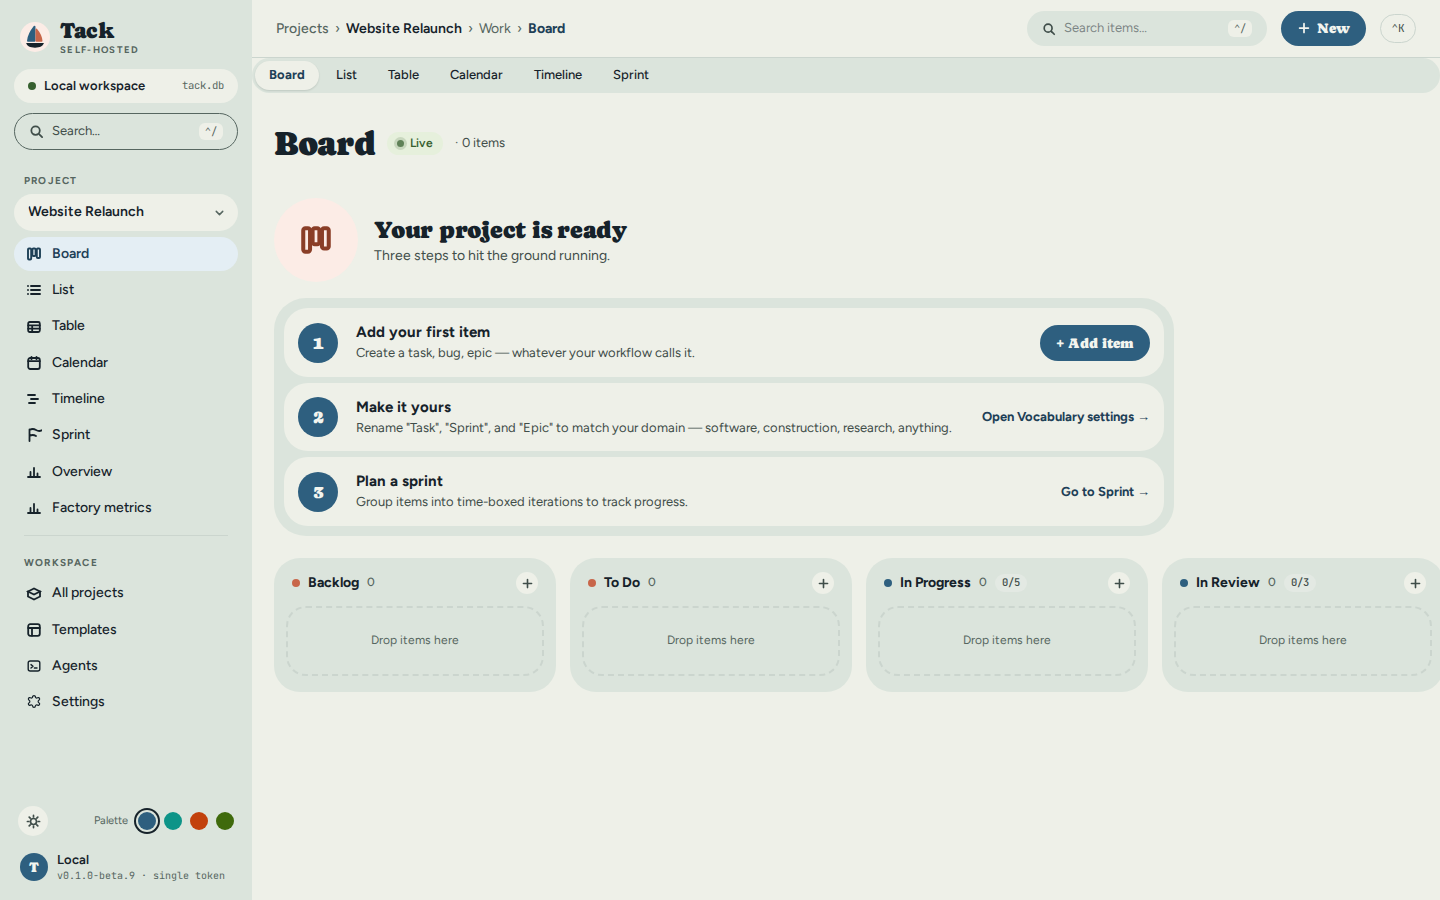
Click Create Project and the new board opens — empty columns from the Scrum workflow, plus a three-step onboarding card:
4. Add tasks
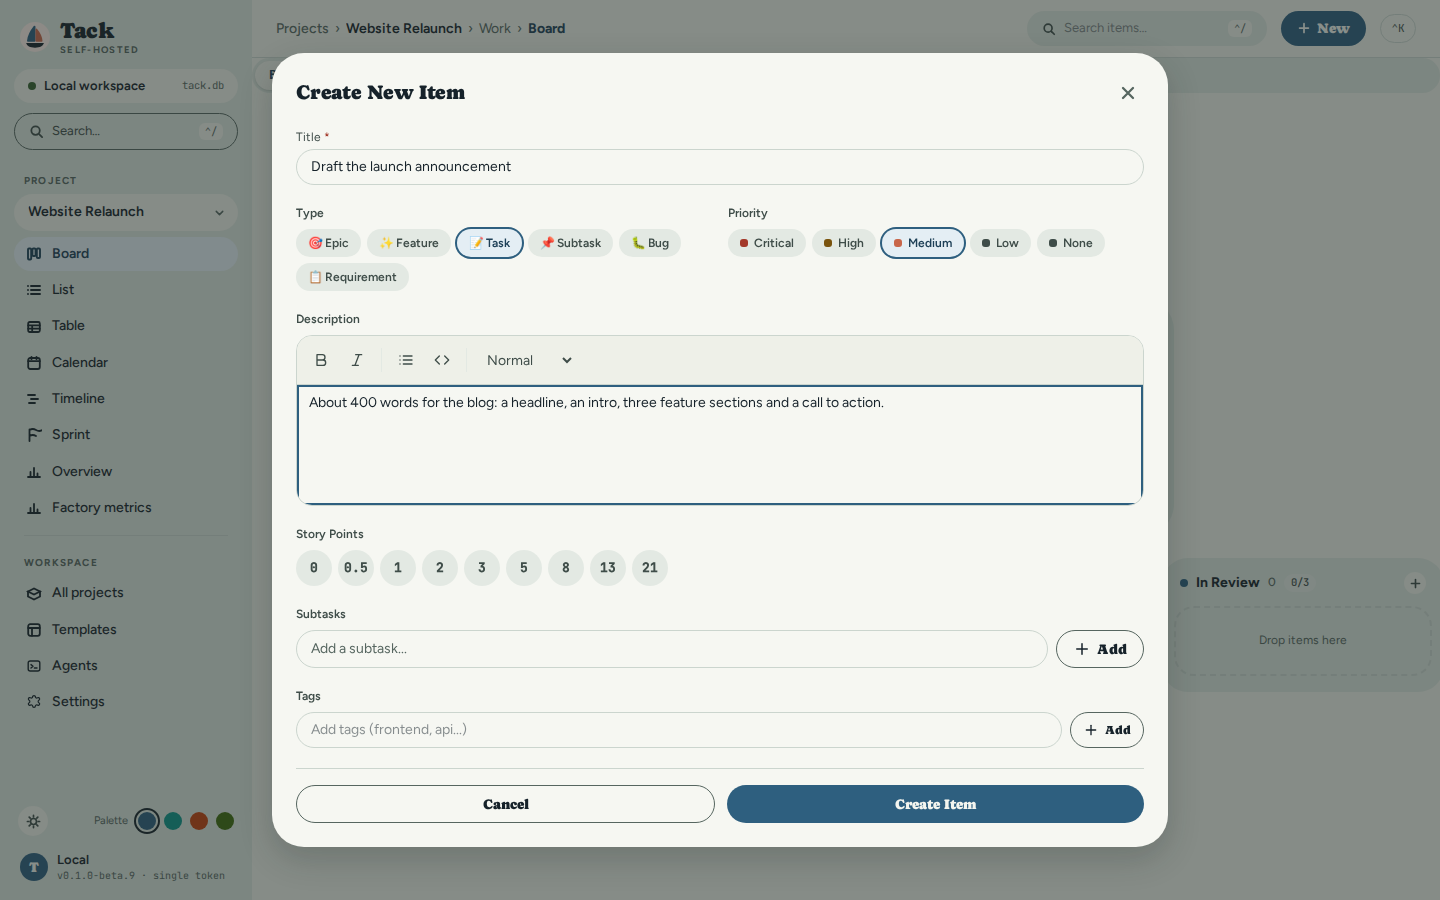
Click the + in any column (or the onboarding card's + Add Item). Only the title is required; type, priority, description, story points, subtasks and tags are there when you want them. The first task is the one an agent will write:
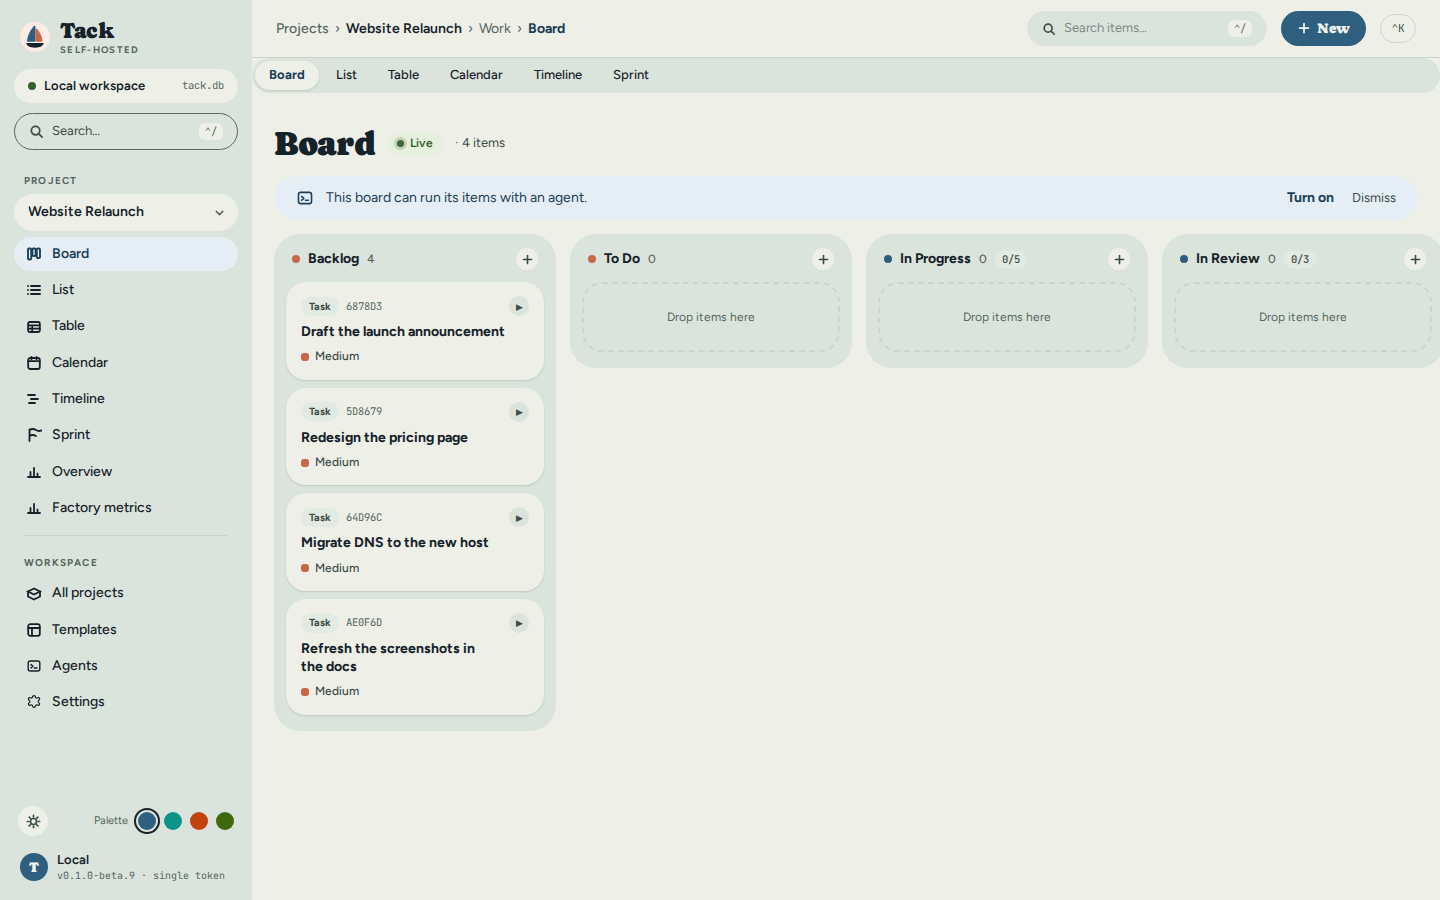
A few tasks later the board is a board. The banner on top offers to let this board run its items with an agent; this tutorial gets there in step 6:
5. Say what "done" means: the brief
Click the task to open its drawer, then the Brief tab. A brief is the definition of done that travels with the task: acceptance criteria, constraints, a definition of done in your own words, and a risk level. Each criterion has a kind — a command, a test, a metric, a file that must or must not exist, or a check a person makes. Prefer a kind a machine can run; this announcement has nothing to run, so both criteria are Manual and the tab marks them as costing a person's time. Save brief stores it:
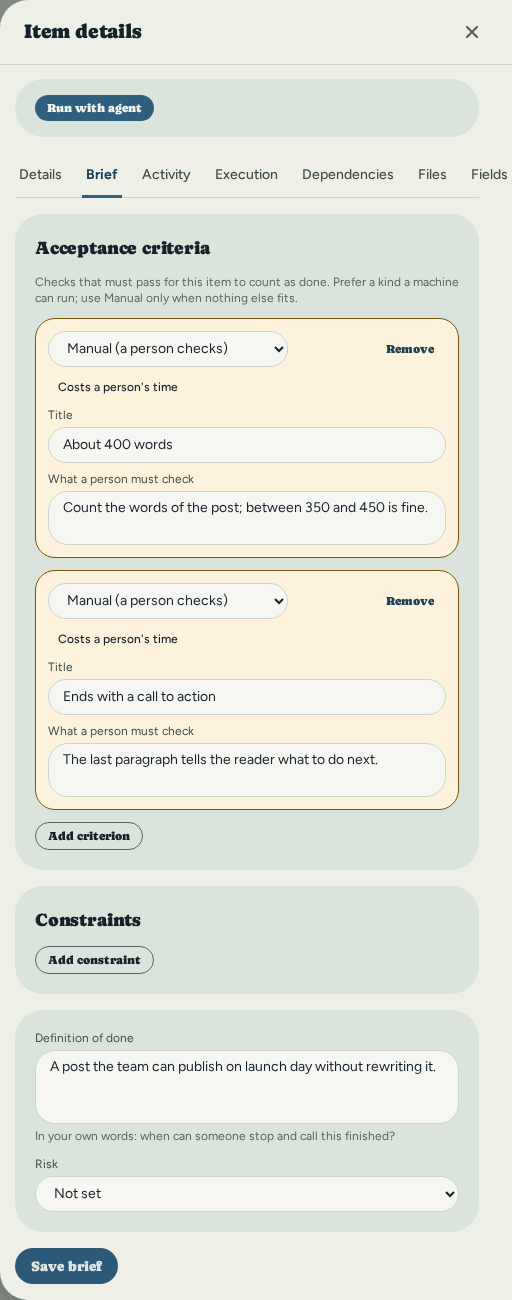
The agent receives the brief with the task's title and description, and the run keeps a copy of it. See Brief tab for every kind of criterion.
6. Set up the harness: turn agent execution on
A harness is the coding agent that does the work — Claude Code here. Tack does not
install it or sign you in to it: install Claude Code and sign in once with its own
claude command, exactly as you would to use it by hand. Tack then finds it.
By default nothing here executes anything — the server is a full project manager with agent execution off. Open the Agents page from the sidebar. Step 1 is the one switch that matters:
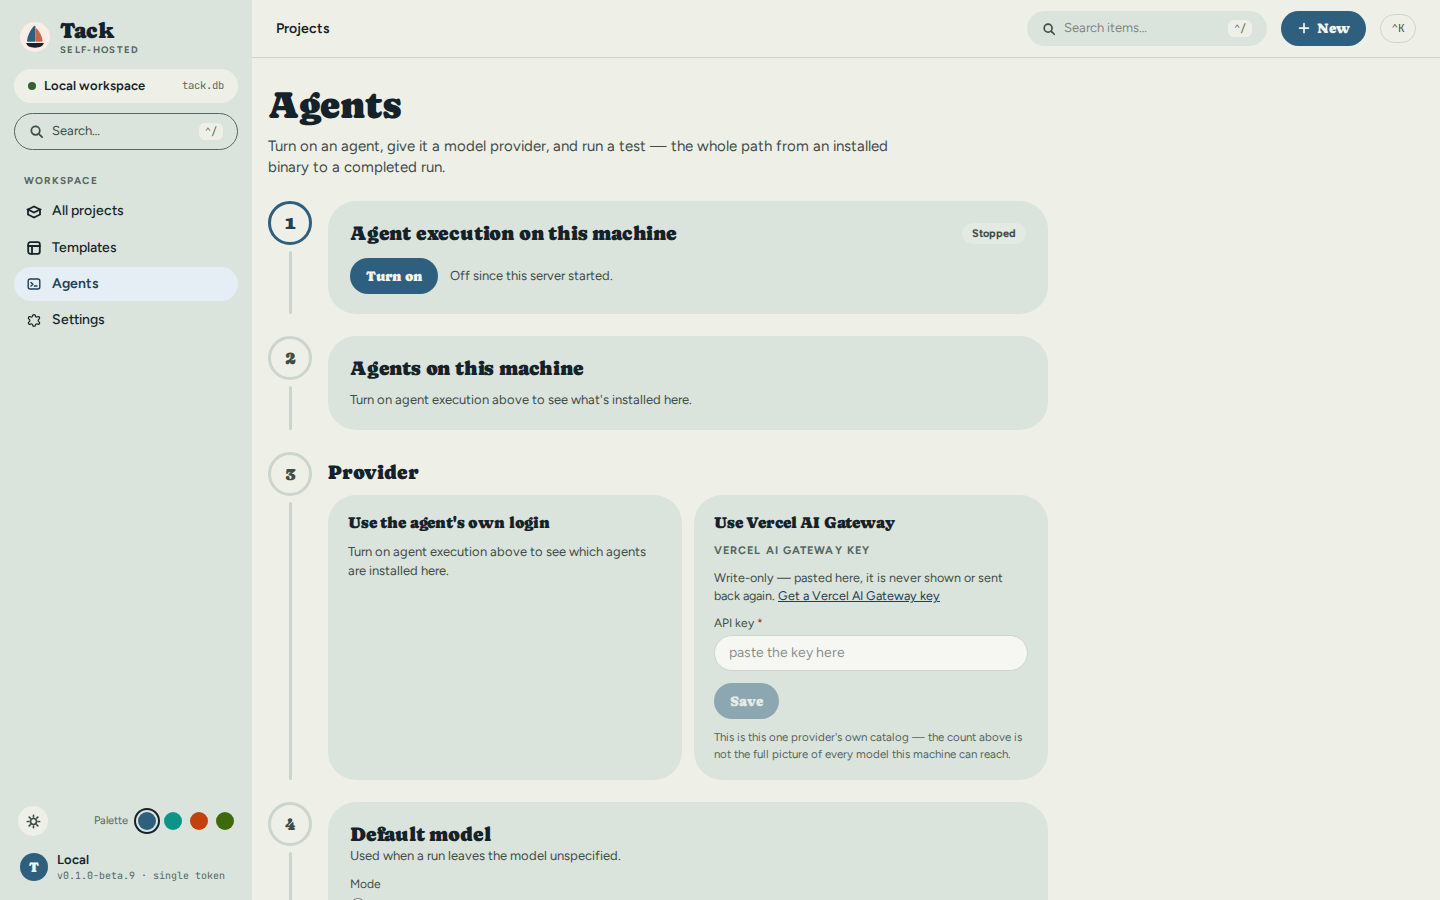
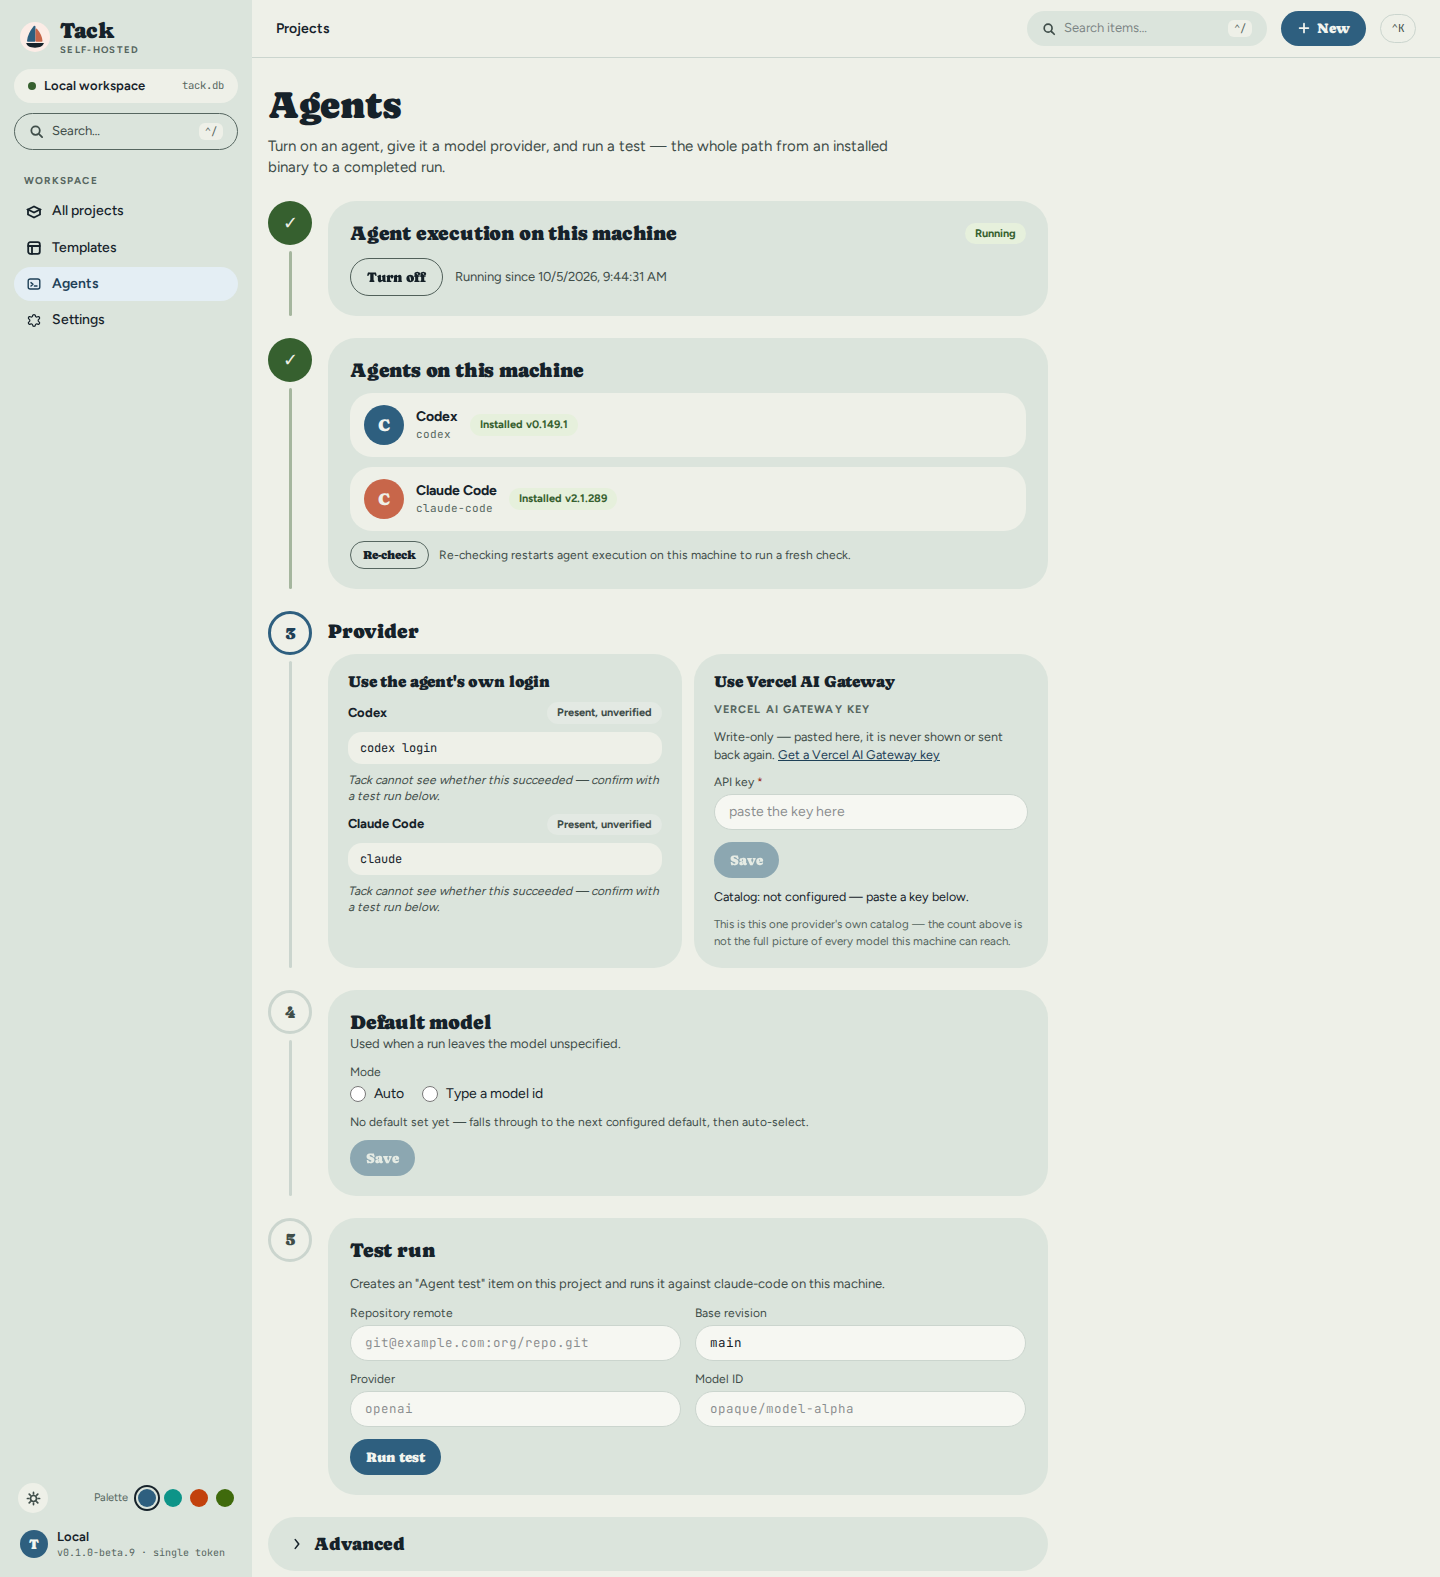
Click Turn on. This starts an embedded runner inside the same server process — no restart, no second binary. Step 2 lists the harnesses it found on this machine, with their installed versions; this machine has Codex and Claude Code, and the tutorial uses Claude Code. Step 3 shows each one's sign-in command and says plainly that Tack cannot see whether that sign-in worked — the run in step 9 is what proves it. If you'd rather not use the harness's own subscription, paste a Vercel AI Gateway key there instead:
7. Set up the agent: a default model and a profile
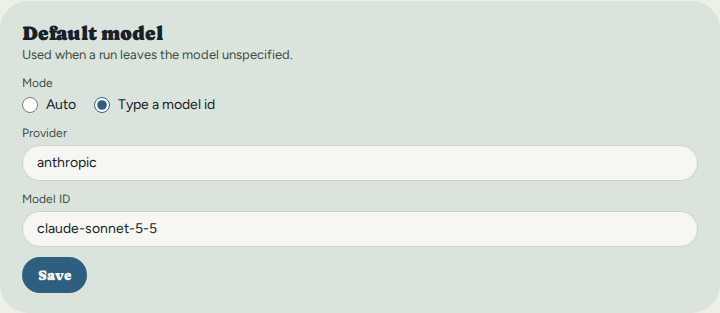
Step 4 on the same page sets the project's default model, so the run dialog needs no hand-typed identifiers. Pick Type a model id, enter the provider and a model your harness accepts, and Save:
An agent profile is the agent's standing orders: a name and the instructions sent with every run that uses it, plus an optional tool policy and limits. Open Advanced at the bottom of the Agents page, then Agent profiles, and + Create agent profile. This one writes announcements and is told not to call any tool:
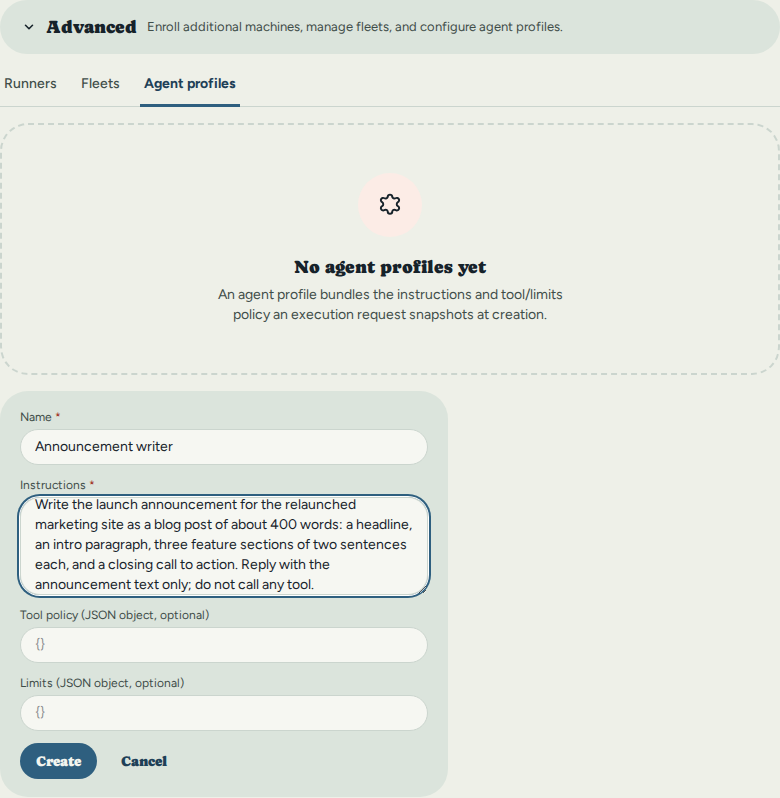
Click Create. With one profile, the run dialog selects it on its own.
8. Assign the task to an agent
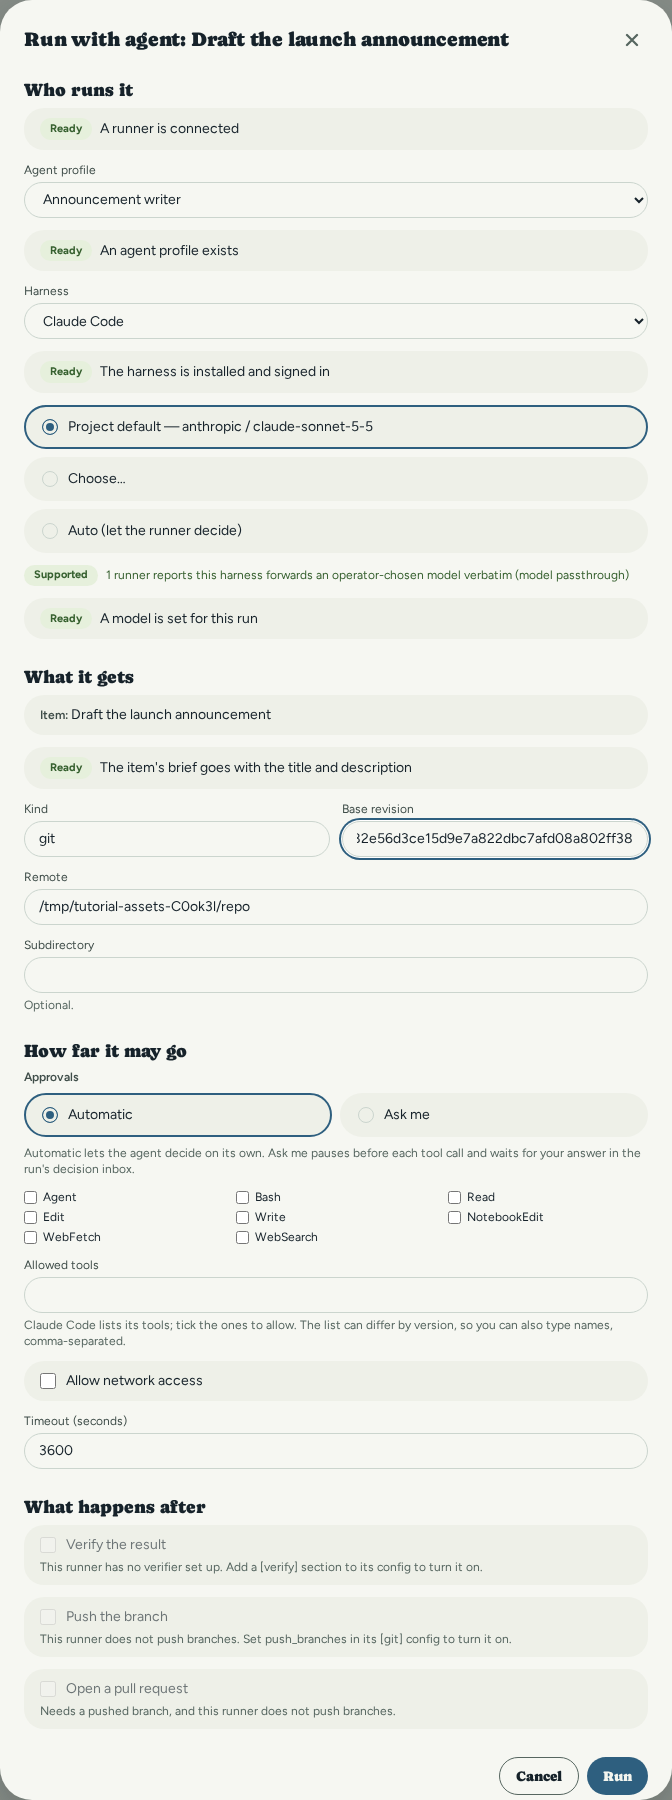
Back on the board, every card carries a Run with agent button (the ▶ on the card, or the same button in the item's drawer). The dialog reads top to bottom as the whole run, and every row says Ready or what is missing:
- Who runs it — this machine's runner, the Announcement writer profile, the harness (choose Claude Code) and the model, already on Project default. The dialog states why this pairing is allowed: the runner reports that the harness passes the chosen model through as given.
- What it gets — the task and its brief, and the repository the agent works in (Change for this run to point it at one; here a local demo repository).
- How far it may go — Automatic lets the agent decide on its own; Ask me pauses it before each tool call until you answer in the task's decision inbox. Claude Code's tools are a checklist; none is ticked, matching the profile.
- What happens after — verifying the result, pushing a branch and opening a pull request. This runner has none of them set up, so each is shown disabled with the reason and the config that turns it on (see After a succeeded attempt).
9. Run it and track it
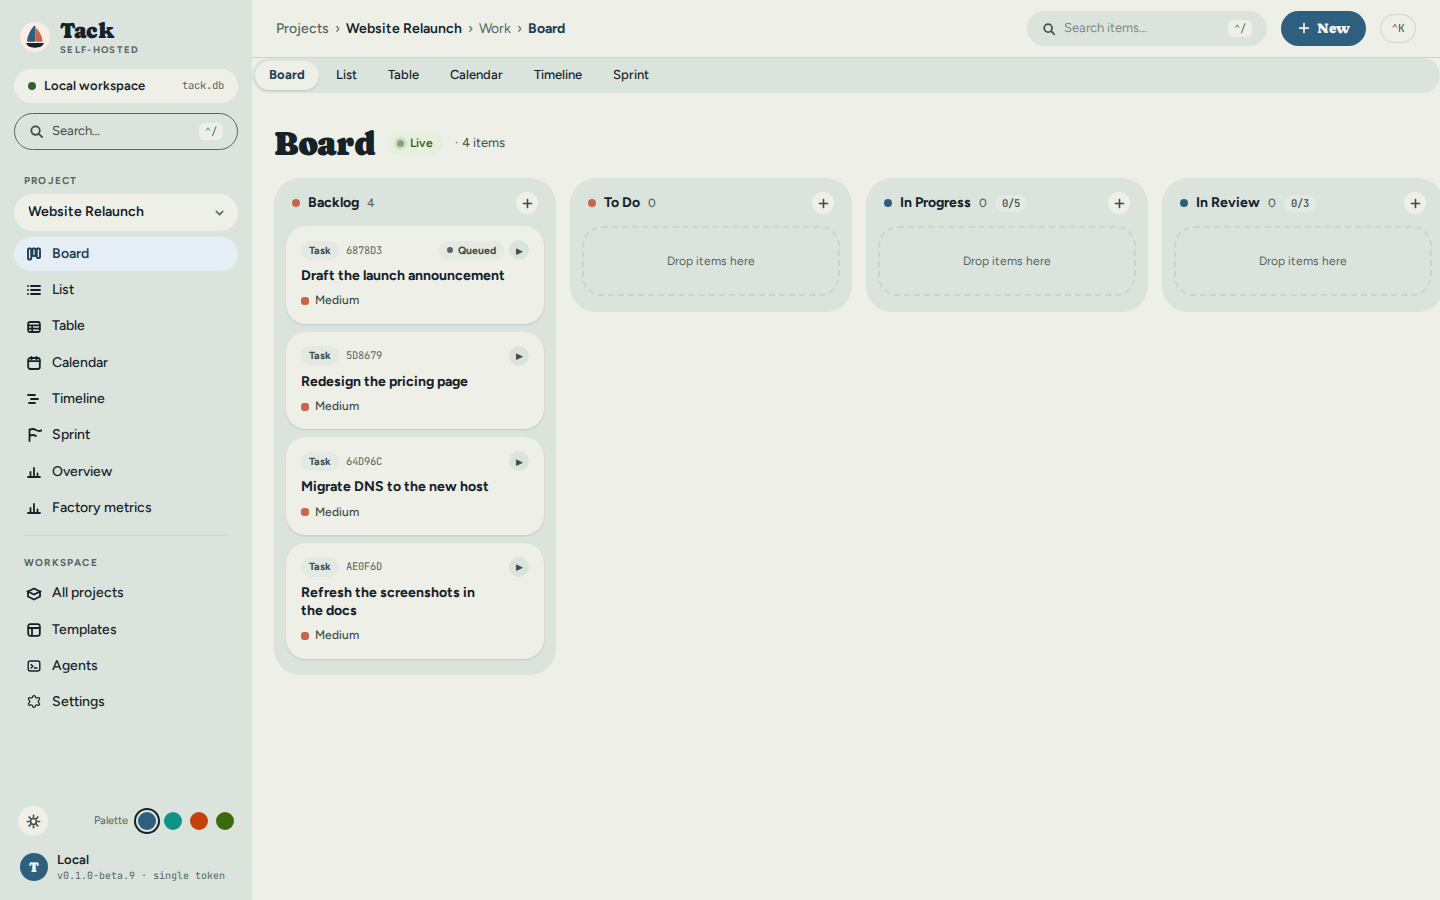
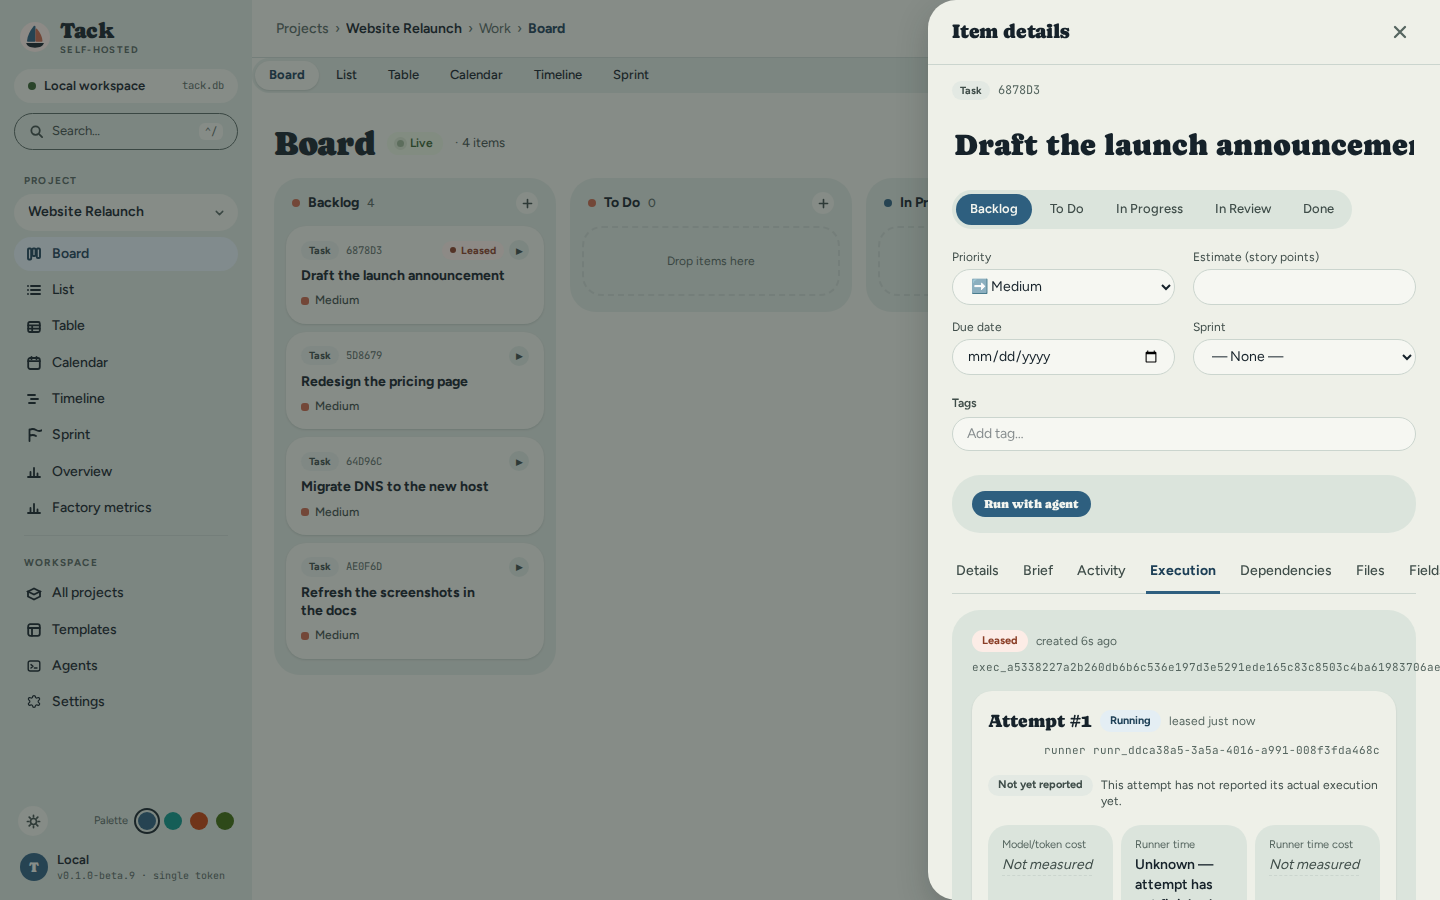
Click Run. The request queues, the runner leases it and the attempt starts — and the board says so without being asked: the card carries a live state chip, here still Queued. Clicking the chip opens the task's Execution tab:
The Execution tab shows the attempt as it happens: the request Leased, the attempt Running on this machine's runner, and cost tiles that read Not measured until the attempt reports real numbers:
10. See the result
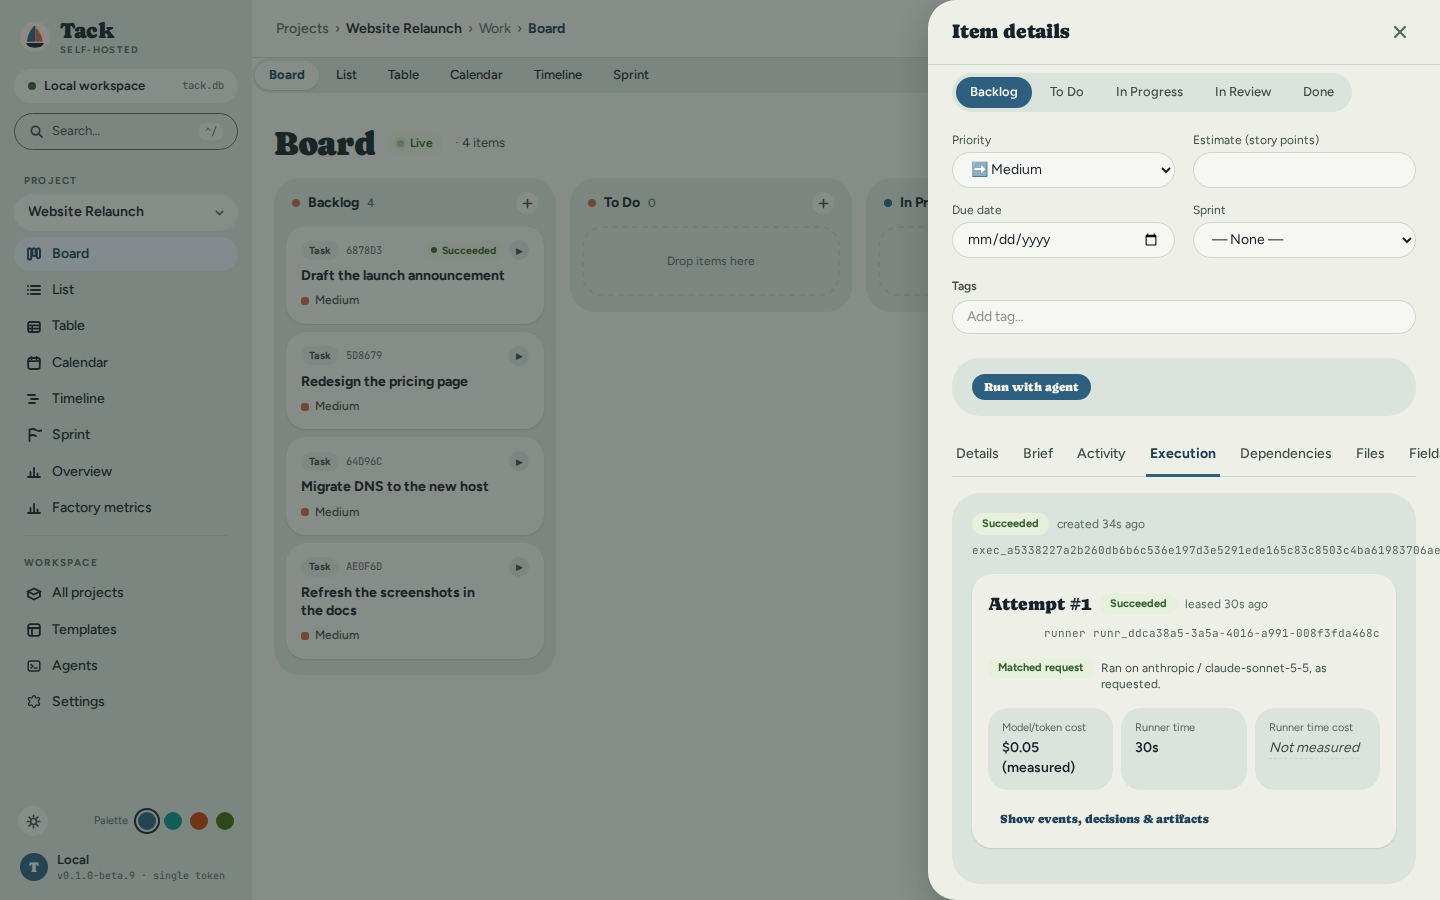
When the attempt finishes, the same tab is the record of what happened: the state, whether the model that ran matched the one requested (reported by the harness, not assumed), and what it cost — measured figures labelled as measured, unmeasured ones saying so. This run took 30 seconds and $0.05:
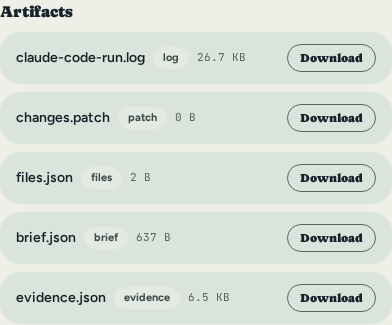
Show events, decisions & artifacts expands the attempt's full record. Its Artifacts
are what the run produced, each one click from download: the harness's own run log
(the announcement is in it), and the record of the change — changes.patch (empty
here: this agent only wrote text), files.json, the brief.json it was given, and the
evidence.json manifest that ties them together:
That's the whole loop: a task on a board with its definition of done, handed to a real agent, tracked live, and closed with a result you can check. From here:
- Agent Runners & Fleet Execution — remote runners on other machines, selectors, budgets, decisions, verification, branch push and pull requests.
- Quick Start — Run an item with an agent — the same flow driven entirely from the CLI.
- Workflows & Statuses and Vocabulary — make the board speak your domain's language.
make the board speak your domain's language.
Regenerating these screenshots
Every image on this page comes from frontend/e2e/tutorial-assets.spec.ts, driven
against an already-running release build (--features embed-spa) of this checkout
on a fresh database, with a real, signed-in claude on PATH. There is no make
target for it on purpose: the run in steps 9–10 is a real, live, billed model call.
The config file, frontend/playwright.tutorial-assets.config.ts, carries the exact
recipe.